Ensure the document is properly structured with the correct heading style assigned to every heading. Use the appropriate heading styles such as Heading 1, Heading 2, Heading 3, etc., for different levels of headings. You can apply these styles from the 'Styles' section in the Word toolbar.

Go to the page where the Table of Contents are to be inserted. Typically, it is placed after the Abstract. Place the cursor in the location where you want the table of contents to appear.

Click on the 'References' tab in the Word toolbar. This tab contains options related to table of contents and other references.

In the 'Table of Contents' section of the toolbar, click on the 'Table of Contents' button. A drop-down menu will appear with different table of contents styles.
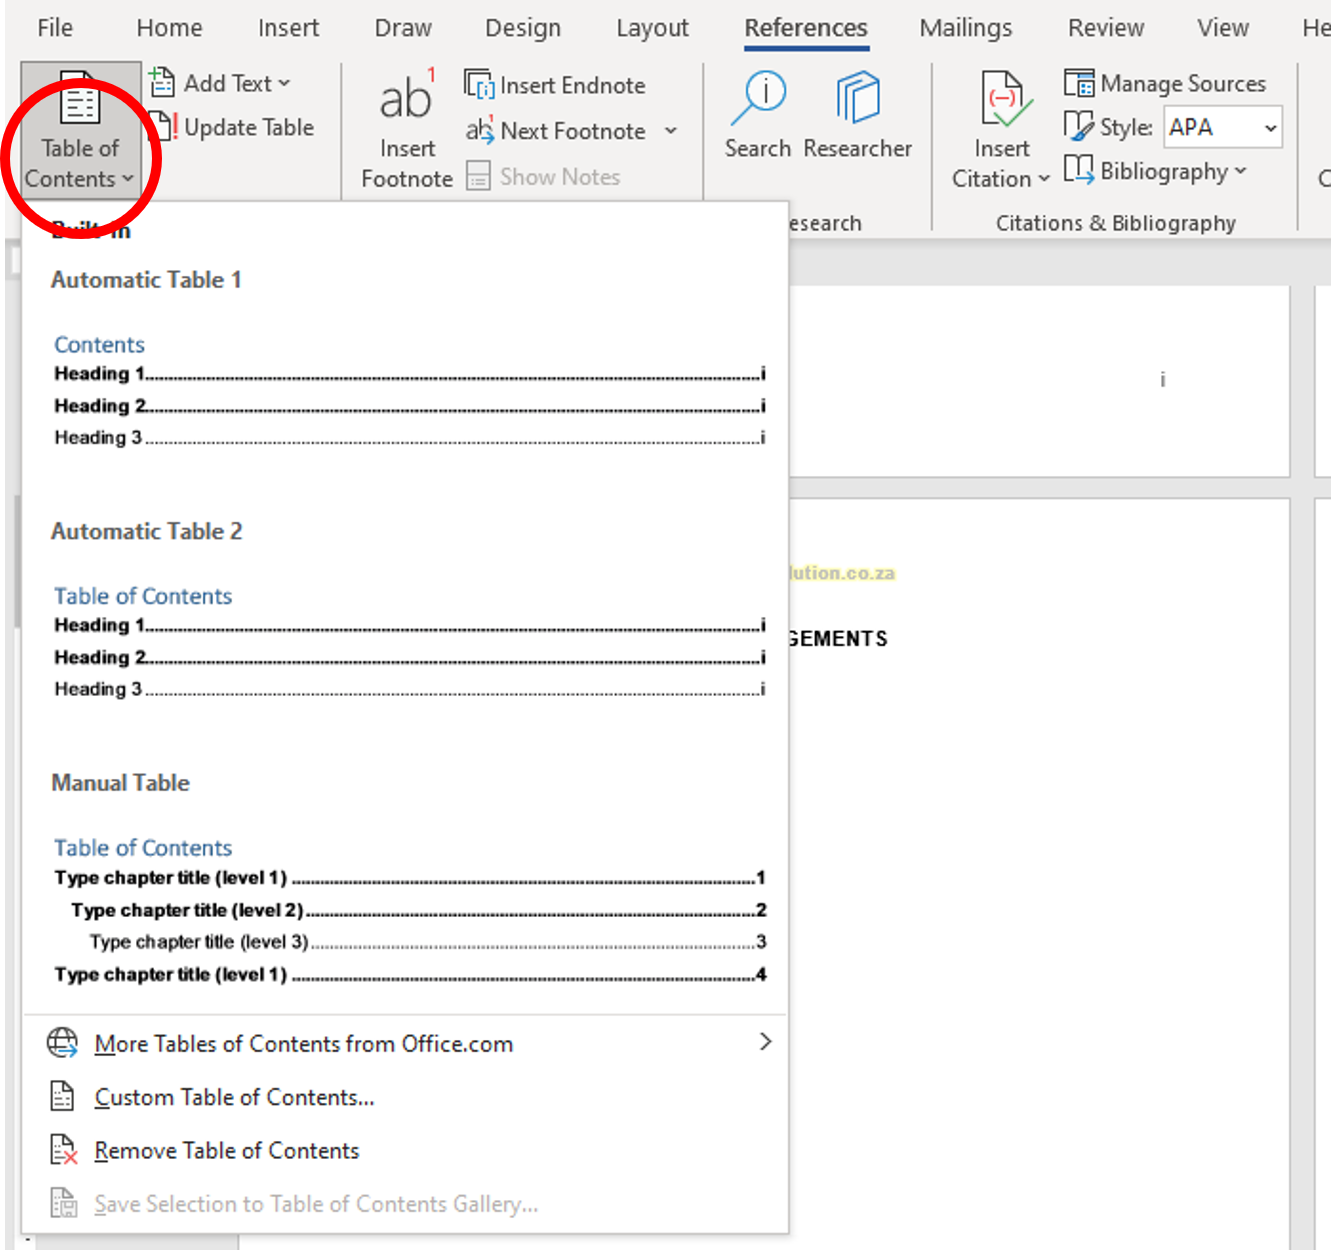
Select the 'Custom Table of Contents' menu option near the bottom.

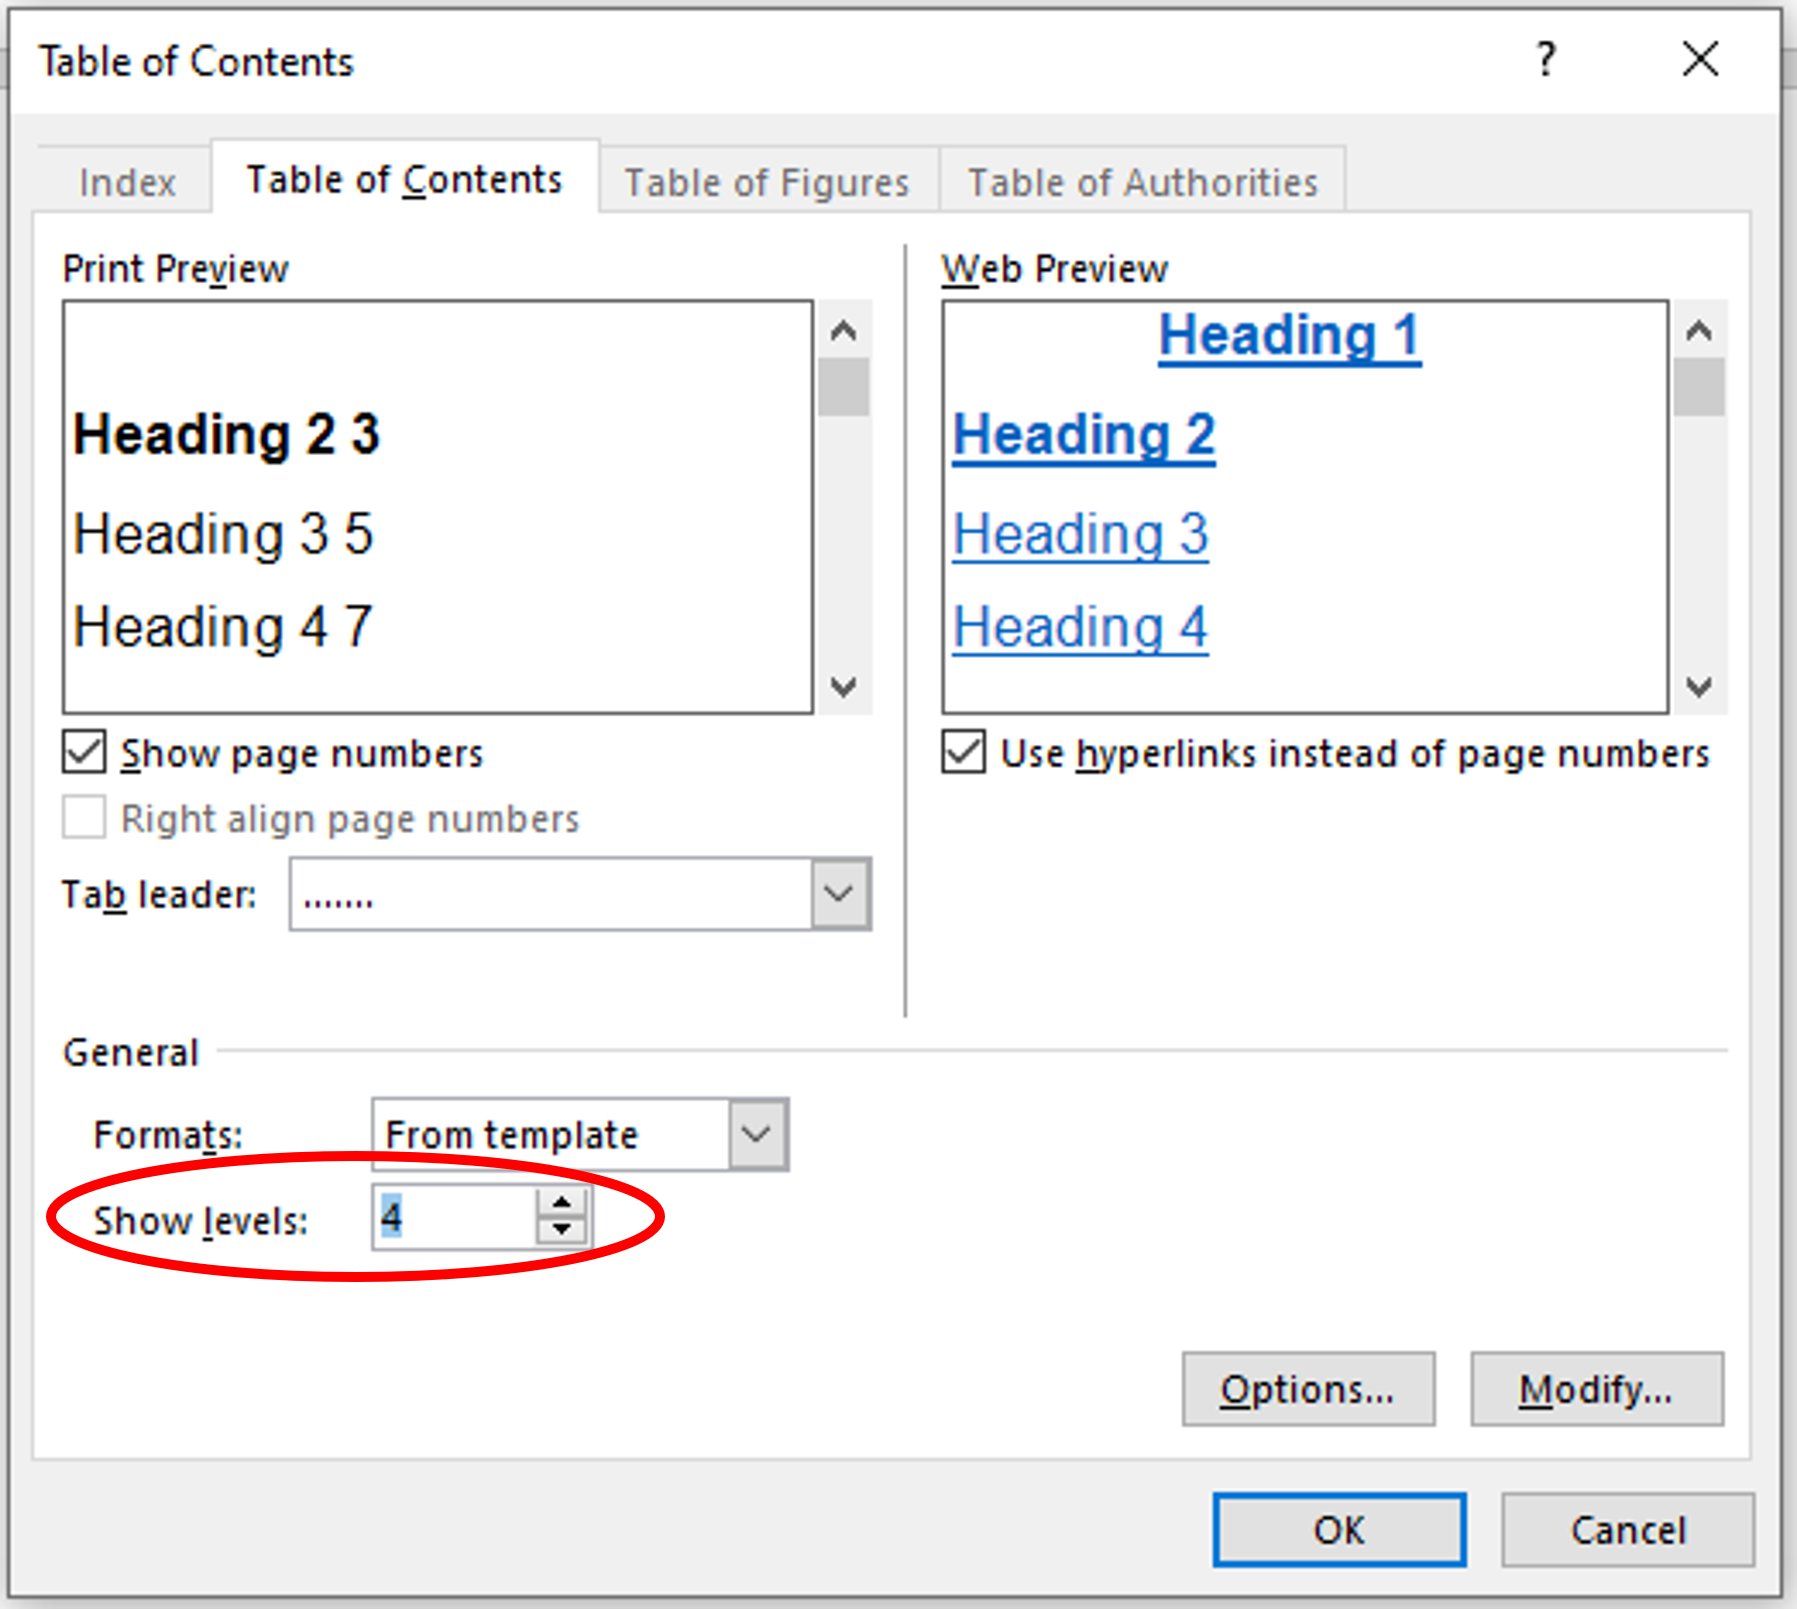
In the Table of Contents window, check the General options at the bottom. The 'Show levels:' number should reflect the number of heading styles to include in the table of contents. For example, if level 4 headings were included (e.g., 1.1.1.1 Sub Heading), then 'Show levels' should be 4. Typically, heading levels should not be more than 4.
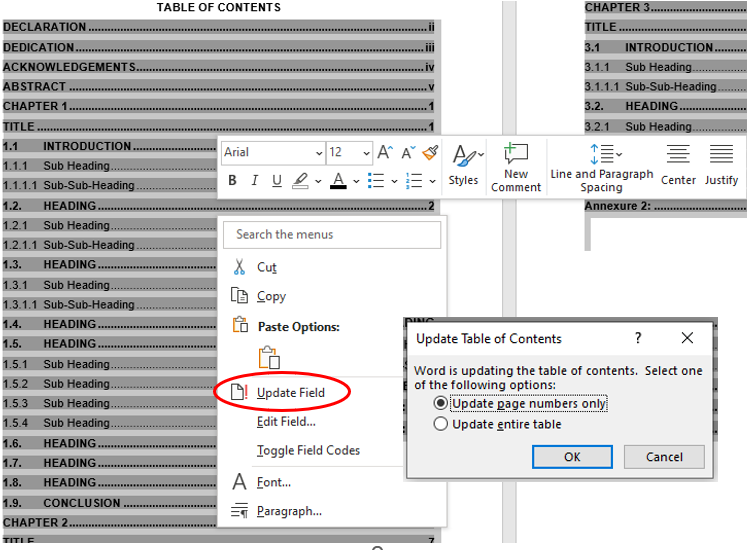
Update the table of contents. Once the table of contents is inserted, it may not immediately be up to date. To update it with the latest headings and page numbers, right-click anywhere on the table of contents and select 'Update Field' from the context menu. Choose the 'Update entire table' option to update all entries or 'Update page numbers only' to update only page numbers.